HYDROGEN SENSOR
Advanced Hydrogen Sensor Solutions for SUNRUI BWTS Systems
![](https://keepermarine.com/wp-content/uploads/2024/08/Sensepoint_XCD.jpg)
Comprehensive Monitoring in Hazardous Environments
The Sensepoint XCD hydrogen sensor range provides thorough monitoring in potentially explosive atmospheres, particularly within the electrolytic units of the SUNRUI Balcor BWTS. Users benefit from advanced technology designed to ensure safety and efficiency in monitoring hydrogen levels.
User-Friendly Operation and Configuration
Featuring a user-friendly interface, the sensors allow for easy modification of detector operation using the LCD and magnet switches, eliminating the need to open the unit. This facilitates one-man, non-intrusive operation, reducing maintenance time and costs. Additionally, a tri-color backlit LCD offers clear indication of the unit's status, enhancing monitoring efficiency.
Versatile Mounting Options and Easy Installation
Designed for versatility, the sensors can be mounted on surfaces or horizontal/vertical pipes using optional brackets. Electrical installation is simplified with conduit or cable options, ensuring flexibility in setup. Furthermore, the sensor's weatherproof design and optional accessories like sunshades and duct mounting kits enhance durability and adaptability in various environmental conditions.
Additional Features and Benefits
All-In-One Gas Monitoring Solution
●Serves new/retrofit, indoor/outdoor applications
●Stainless steel or aluminum explosion-proof housing options
●IP66 as standard
Proven and Reliable Sensor Technology
●Poison immune infrared sensors
●Poison resistant catalytic bead sensors
●Long life sensors
Global Approvals
●Compliant with UL, INMETRO, ATEX, IECEx, CSA, KTL, PA, GB and CCCF standards
Easy to Use
●Fully configurable via magnetic switches
●Optional remote sensor mounting
●Selectable sink or source 4-20mA output
●Auto-inhibit during maintenance
●MODBUS communications for remote diagnostics/configuration
Cost Effective
●Minimal training required
●Reduced spares
●Non-intrusive, one-man operation
●Plug-in sensor replacement
●MODBUS multi drop option offers cabling savings
Simple Installation
●Integral mounting bracket
●2 x M20 or ¾” NPT cable/conduit entries Removable plug/socket type terminal blocks
●Sink/source switch to suit preferred wiring topology
●Integral mounting plate attaches to surface, horizontal or vertical piping
![](https://keepermarine.com/wp-content/uploads/2024/08/R-C.png)
Hydrogen Sensor for SUNRUI BWMS
How to calibrate the hydrogen sensor?
Before initial calibration allow the detector to stabilize for 30 minutes after applying power. When in zeroing and span calibration mode the current output from the detector is inhibited (default 2mA) to avoid false alarms.
For Flammable gas calibration use a calibration gas concentration of between 25% LEL and 75% LEL to ensure that the required accuracy can be attained. For Hydrogen Sulfide type sensors refer to section 10.1.2 before conducting zero and span calibration. For toxic sensors use a calibration gas of approximately 50% FSD.
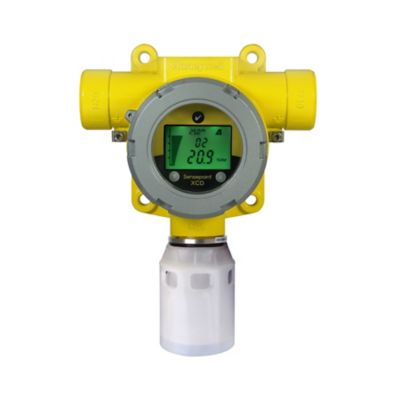
To calibrate the detector, use an appropriate span gas cylinder, constant flow regulator AND the Sensepoint XCD Gassing.
A compressed air cylinder (20.9%Vol oxygen) should be used to perform the zero calibration if the area where the detector is located contains any residual amount of the target gas. If no residual gas is present then the background air can be used to perform the zero calibration. Contact your Honeywell Analytics representative for details of suitable calibration kits.
When calibrating the Flammable IR or CO2 IR sensors, it is essential that the zero calibration is always followed by a span calibration. The zero calibration must never be done alone.
1.If the ambient air is NOT considered reliable to use to set the ZERO, then remove the weather protection and fit the Gassing Cap accessory (see Section 4.3) onto the sensor and apply a clean source of zero gas or compressed air.
2.To access the calibration menu, hold the end of the magnet over the switch located at the top center of the detector display (ü) for at least 3 seconds and then remove.
3.The display will indicate the first configuration mode menu ‘SET CAL’.
4.Put the magnet over the ‘ü’ switch again and move to enter the Calibration menu.
5.The display will show the current gas reading, and the gas canister icon flashes.
6.When the zero gas reading is stable use ‘ü’ to confirm zero calibration.
7.If successful the display shows ‘ZERO PASS’ (if not successful, the display shows ‘ZERO FAIL’ and returns to configuration mode).
8.If using zero-air, turn it off. Zeroing is complete and saved.
9.The display shows ‘SPAn’ with ‘YES’ flashing.
10.If span calibration is required use ‘ü’ proceed to the next step. If span calibration is not required, use ‘▲▼’ to select ‘No’ and ‘ü’ to return to configuration mode.
When calibrating the Flammable IR or CO2 IR sensors, it is essential that the zero calibration is always followed by a span calibration. The zero calibration must never be done alone.
The display shows the current calibration span gas concentration while flashing the gas canister icon. Use ‘▲▼’ to change the calibration span gas concentration, and ‘ü’ when
required span calibration level is set.
The display will show the current gas reading, and the gas canister icon flashes.
Connect the regulator to the span gas cylinder.
Apply the span gas to the sensor using the Sensepoint XCD Gassing Cap (see section 4.7 for description). The live gas reading is displayed. When the reading is stable, use ‘ü’ to confirm span calibration.
If the sensor has been replaced the SEnS rEPL display may be shown.
Use ‘▲▼’ to select ‘YES’ if the sensor has been replaced or ‘No’ if it has not been replaced.
If the span calibration is successful the instrument will briefly display ‘SPAn PASS’ (if fails ‘SPAN FAIL’ displayed and returns to configuration mode).
Note: the calibration due warning counter is reset after a successful calibration.
The display alternates between “Purg gAS” and the gas reading to indicate that the unit is expecting the span gas to be removed from the sensor.
Promptly switch off the calibration span gas and remove the Sensepoint XCD Gassing Cap from the sensor to allow the gas to disperse.
When the reading falls below 50% of the calibration gas level the display indicates a countdown (up to 180 seconds dependant on gas type).
When the countdown is finished, the calibration procedure is complete.
The instrument returns to the ‘Set CAL’ menu. Activate the ‘▲’ or ‘▼’ switch to select another menu or select ‘QuIT’ to return to normal monitoring mode.